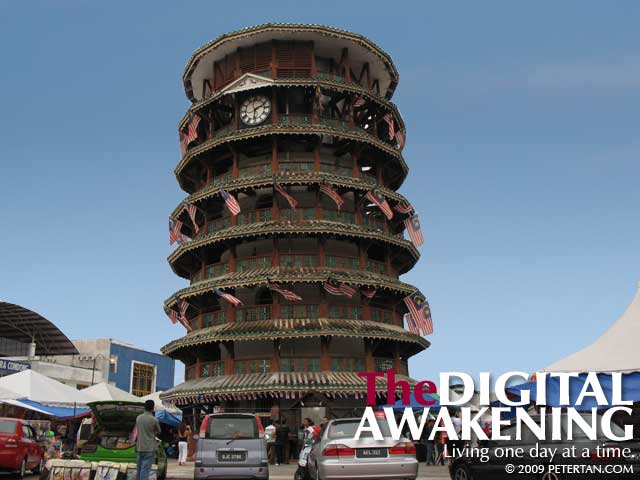
Leaning Tower of Teluk Intan with a nice blue sky background.
Part 1 is here. I was still not satisfied with the colour of the sky after the second attempt. Surely there must be an easier and a more accurate way to this process. And I discovered there indeed was an easier a better way to make the sky look more realistic! For this method, an image of blue sky is needed. It can be an image with other objects. As long as the area of the sky is large enough to fill the sky area of image being worked on, it is good to use.
This is the second and better method to turn a cloudy sky to a nice shade of blue with Photoshop:
1. Select the Magnetic Lasso Tool and trace the outline of the objects that are not part of the sky.
3. Click Layer > New > Layer via Copy. This will create another layer with the selected objects.
4. Open the the image of the sky and drag into the object image window.
5. Select the sky layer and click Layer > Arrange > Send Backward. This is to place the sky layer behind the object layer.
Steps 6 to 12 are additional steps included after I published this entry. Skip Steps 6 to 9 if the sky image is the same size as the object image. These steps are to crop the sky layer to the size of the object image if it is larger. Steps 10 to 12 are to make the sky look more realistic by making the sky overhead darker and gradually lighter towards the horizon.
6. With the sky layer still selected, drag the Rectangular Marquee Tool across the entire composite image to select the entire image within the window.
7. Click Layer > Create Clipping Mask.
8. Click Image > Crop.
9. Click Select > Deselect. This is to turn off the marquee around the image.
10. Select sky layer. Click Layer > Layer Style > Gradient Overlay.
11. Check and select the Gradient Overlay box.
12. Select Normal for Blend Mode, 20% for Opacity, Black and White for Gradient, Linear for Style, -90% for Angle and 50% for Scale. Click OK to close the window.
13. Click Layer > Flatten Image to complete the process.

Kinda fake ler. 😛
Peter:
*faints* When do you have time to teach me to shoot like you? 😀
Looks better than the previous one. 😀
Peter:
Thank you. Still learning.
thanks for the tips. though I never even tried using Photoshop.
a little complicated lah ….
Peter:
You are welcome. It will not be complicated after you have done it a few times. 🙂